
티스토리 뷰
2020/12/20 - [프로그래밍/자바스크립트] - WebAssembly를 활용한 Rich Text Editor 제작기 1편
[WebAssembly를 활용한 Rich Text Editor 제작기 1편
WebAssembly 아직까지 많은 활용은 이뤄지지 못하고 있지만 모든 모던 웹브라우저가 지원을 하기 시작했고, 많은 양의 데이터의 처리가 항상 문제가 되는 웹 특성상 이 속도를 획기적으로 줄일 수
shifeed.tistory.com](https://shifeed.tistory.com/entry/WebAssembly를-활용한-Rich-Text-Editor-제작기-1편)
실제 문서 편집에 필요한 아이콘 추가하기
앞서는 간단히 Rust에서 Dom을 조작할 수 있게 설정하고
최소한이 필요함인 텍스트 에디터 형태의 속성을 추가하는데서 끝마쳤다.
이제는 해당 텍스트 에디터의 서식이나 스타일을 정의하고 변경하는 버튼을 추가 하려 한다
물론 html, javascript 으로 코딩할 수 있는 부분이기도 하지만 목적은 Rust에서 활용할 수 있는 코드들을 알아보기 위함이니 Rust에서 추가해보도록 하자.
src/lib.rs
pub fn web_editor(dom: &str) -> Result<(), JsValue> {
..
..
..
/** 툴바 추가 **/
let toolbar = document.create_element("div").unwrap(); //툴바의 부모 div
toolbar.set_class_name("wasm-toolbar"); //css를 위해 클래스를 설정해줌.
let textleft = document.create_element("button").unwrap(); //document.createElement('button')
textleft.set_class_name("toolbar-menu text-align-left"); // textleft.className
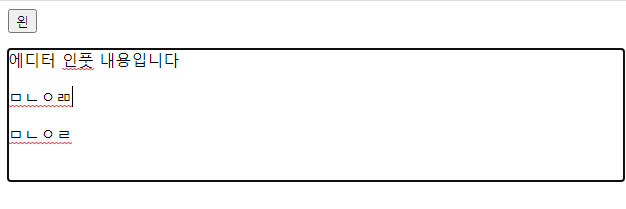
textleft.set_inner_html(&"왼"); //textleft.setInnerHtml
toolbar.append_child(&textleft); //toolbar.appendChild
wrapper.append_child(&toolbar); //에디터내에 툴바 div를 추가.
}
각 행의 주석에서 볼 수 있듯이 최대한 javascript의 기존 함수와 비슷한 형태를 띄고 있으나 약간씩 함수명이 다르며
rust 특성상 문자열을 입력할때는 &를 붙여야 하는등 약간의 번거로움이 있으며
대부분 지원하나 일부 함수가 제대로 동작되지 않거나 지원되지 않는 것들이 있다.
https://crates.io/crates/web-sys
해당 제작을 위해 필요한 함수를 제외한 활용법과 데이터 타입, 리턴형 현재 지원하는 함수 등은 위의 링크에서 보고 활용할 수 있다.
결과
$ wasm-pack build --target web
빌드를 해보고 실행을 시키면 보기에 너무 허접해보이는 버튼과 editor편집창을 볼 수 있다
우선 간단히 보여지는 모습이 에디터 다워야 하기에
wasm-rte.css 파일을 추가하여 다음과 같이 입력한다.
:root {
  --toolbar-button-bg:transparent;
  --toolbar-button-width:22px;
  --toolbar-button-height:22px;
  --toolbar-border-color:#7d817f;
  --toolbar-hover-color:#e9e9e9;
  --toolbar-margin:0 0.15rem;
  --toolbar-fontsize : 0.75rem;
  --modal-bg:rgba(0.5, 0.5, 0.5, 0.3);
  --modal-window-bg:#FFFFFF;
}
p {margin:0;padding:0;word-break:break-all}

.wasm-editor .wasm-content{
  min-height: 300px;
  border: 1px solid #e9e9e9;
  padding: 8px;
}
.wasm-editor .wasm-toolbar .hyperlink{text-decoration: underline;}
.wasm-editor .wasm-toolbar .underline{text-decoration: underline;}
.wasm-editor .wasm-toolbar .italic{font-style: italic;}
.wasm-editor .wasm-toolbar .bold{font-weight: bold;}
.wasm-editor .wasm-toolbar .toolbar-menu:focus, .wasm-editor .wasm-content:focus{
  outline: none;
}
.wasm-editor .wasm-toolbar .toolbar-menu{
  font-size: var(--toolbar-fontsize);
  background-color: var(--toolbar-button-bg);
  height:var(--toolbar-button-height);
  width:var(--toolbar-button-width);
  border :0;
  border-radius: 0.25rem;
  font-weight:bold;
  cursor:pointer;
  margin:var(--toolbar-margin);
  text-align:center;
}
.wasm-editor .wasm-toolbar .toolbar-menu:hover {
  background-color: var(--toolbar-hover-color);
}
.wasm-modal-wrapper {
  background-color: var(--modal-bg);
  position:fixed;
  top:0;
  left:0;
  z-index: 100;
  width:100%;
  height:100%;
  text-align:center;
}
.wasm-modal{
  background-color: var(--modal-window-bg);
  border:1px solid var(--toolbar-border-color);
  min-height:9rem;
  min-width:16rem;
  max-width:16rem;
  margin: 0 auto;
  position: relative;
  z-index:101;
}
.wasm-modal-footer{
  bottom:0;
  left:0;
  position: absolute;
  width:100%;
  height:2.5rem;
}
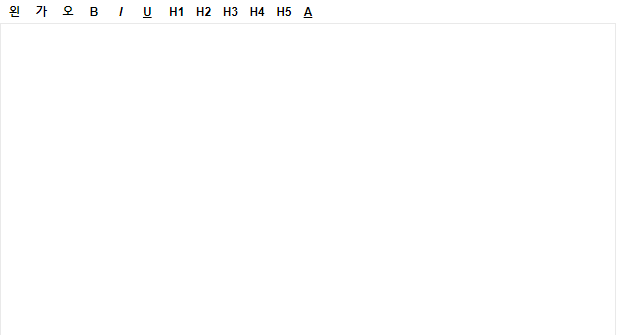
그리고 나머지 기본적인 에디터의 버튼을 추가해준다
lib.rs
let textleft = document.create_element("button").unwrap();
textleft.set_class_name("toolbar-menu text-align-left");
textleft.set_inner_html(&"왼");
toolbar.append_child(&textleft);
let textcenter = document.create_element("button").unwrap();
textcenter.set_class_name("toolbar-menu text-align-center");
textcenter.set_inner_html(&"가");
toolbar.append_child(&textcenter);
let textright = document.create_element("button").unwrap();
textright.set_class_name("toolbar-menu text-align-right");
textright.set_inner_html(&"오");
toolbar.append_child(&textright);
let bold = document.create_element("button").unwrap();
bold.set_class_name("toolbar-menu bold");
bold.set_inner_html(&"B");
toolbar.append_child(&bold);
let italic = document.create_element("button").unwrap();
italic.set_class_name("toolbar-menu italic");
italic.set_inner_html(&"I");
toolbar.append_child(&italic);
let underline = document.create_element("button").unwrap();
underline.set_class_name("toolbar-menu underline");
underline.set_inner_html(&"U");
toolbar.append_child(&underline);
for i in 1..6 {
   let heading = document.create_element("button").unwrap();
   heading.set_class_name("toolbar-menu heading");
   heading.set_inner_html(&format!("H{}", i));
   toolbar.append_child(&heading);
}
let hyperlink = document.create_element("button").unwrap();
hyperlink.set_class_name("toolbar-menu hyperlink");
hyperlink.set_inner_html(&"A");
wrapper.append_child(&toolbar);위의 라인에 넣어주면된다.
수정결과
그리고 빌드하면 아래와 같은 모습의 심플한 에디터를 만날 수 있다.
다음글에는 해당 버튼들이 실제로 동작할 수 있게 하는 방법.
그리고 외부 js를 rust내에서 접근하고 연결할 수 있는 방법을 알아보도록 하려한다.
'프로그래밍 > 자바스크립트' 카테고리의 다른 글
| IFrame YOUTUBE API를 활용한 custom player 개발 1편 (0) | 2020.12.23 |
|---|---|
| 클라이언트(사용자)쪽에서 비디오 썸네일 뽑기 (0) | 2020.12.22 |
| innerHTML을 사용할때 주의 할 점. (0) | 2020.12.22 |
| 폼 데이터를 json 데이터로 보내고 싶을 때. (0) | 2020.12.21 |
| WebAssembly를 활용한 Rich Text Editor 제작기 1편 (0) | 2020.12.20 |
- Total
- Today
- Yesterday
- iframe
- HWP
- 티스토리API
- 마크다운
- #useState 특징
- vscode
- 7위를 하는 이유
- WASM
- contributer
- 무관의 왕
- 웹어셈블리
- vtie
- webassembly
- 팀별 분석
- JavaScript
- API
- 노력만 가상한 글
- KBL
- youtube
- 그래프
- #업데이트가 이상하게 될떄
- craco
- #팀별 분석
- #노력만 가상한 글
- #그래프
- contributor
- #useState
- Rust
- ffmpeg
- 배포
| 일 | 월 | 화 | 수 | 목 | 금 | 토 |
|---|---|---|---|---|---|---|
| 1 | 2 | 3 | ||||
| 4 | 5 | 6 | 7 | 8 | 9 | 10 |
| 11 | 12 | 13 | 14 | 15 | 16 | 17 |
| 18 | 19 | 20 | 21 | 22 | 23 | 24 |
| 25 | 26 | 27 | 28 | 29 | 30 | 31 |